Extract PNG Malware from PCAP File
I want to talk about How I detected and extracted PNG malware from a PCAP file.
What we will cover in this post:
- Introduction to Packet Analysis
- Introduction to Wireshark
- Detect Malicious Network Traffic
- Partial Content Responses
- Impact of Connection Problems
- Extract Malicious File from HTTP for analysis and Reverse Engineering
Nowadays cyber attacks have become more sophisticated. The use of malware is increasing, Malware comes in many forms such as:
- Trojan
- Worms
- Viruses
- etc.
A malware communicates with different domains and IP addresses for various reasons (e.g. Connect to C&C, Download the Real Malware, etc.). One of the steps of Malware Analysis is to examine these network connections.
We can analyze Malware network communications with different methods and tools, We can use some tools such as FakeNet or iNetSim to simulate and analyze outgoing connections, also we can analyze the captured network packets such as .pcap file, which can be analyzed by Wireshark.
Wireshark is a free and open-source packet analyzer. It is used for network troubleshooting, analysis, software and communications protocol development, and education.
 Wireshark Application
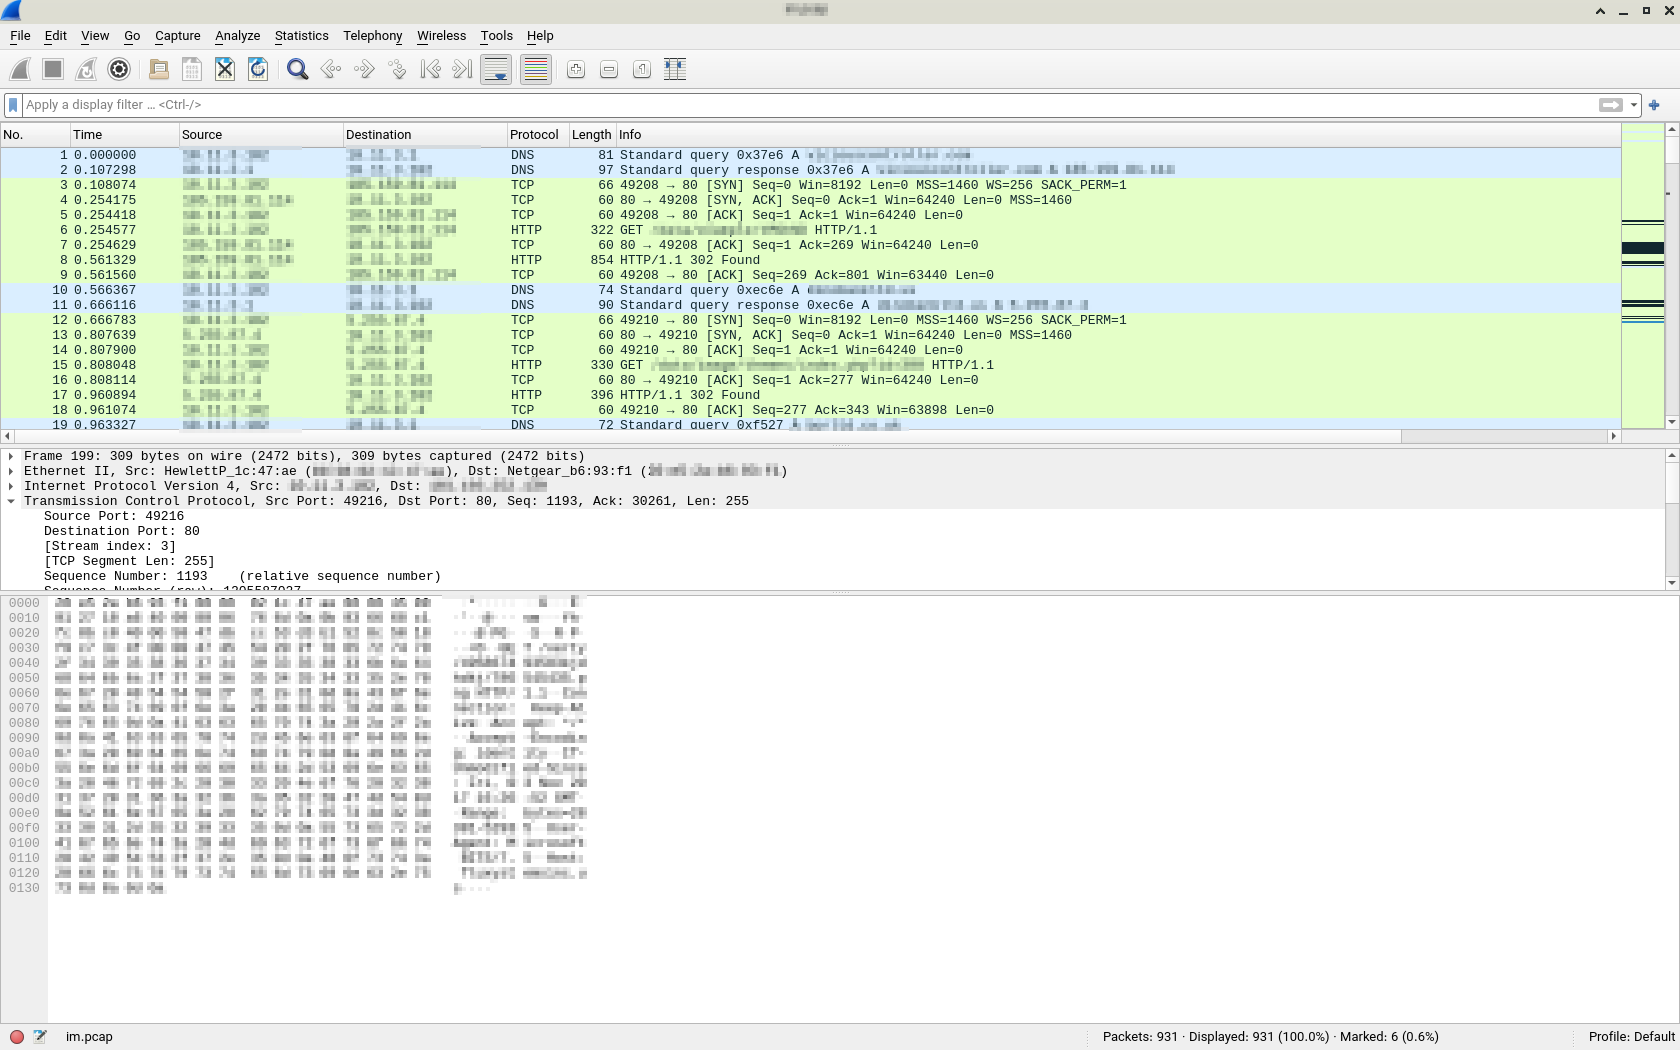
Wireshark contains 3 windows, the top window (with the green bg colour) whose name is Packet List, the middle one (called the “Packet Details” window) and the bottom one (the “Packet Bytes” window).
- Packet List: Displays packets sent in a network interface.
- Packet Details: Displays the information and headers of a sent packet in details.
- Packet Bytes: This section displays the contents of a sent package in HEX and ASCII.
I want to analyze malicious network communication (for a malware) from the PCAP file in this post. First, we’re going to open PCAP file (malware.pcap) in Wireshark, to do this, Select File -> Open from the menu bar. (or simply use Ctrl + O shortcut key).
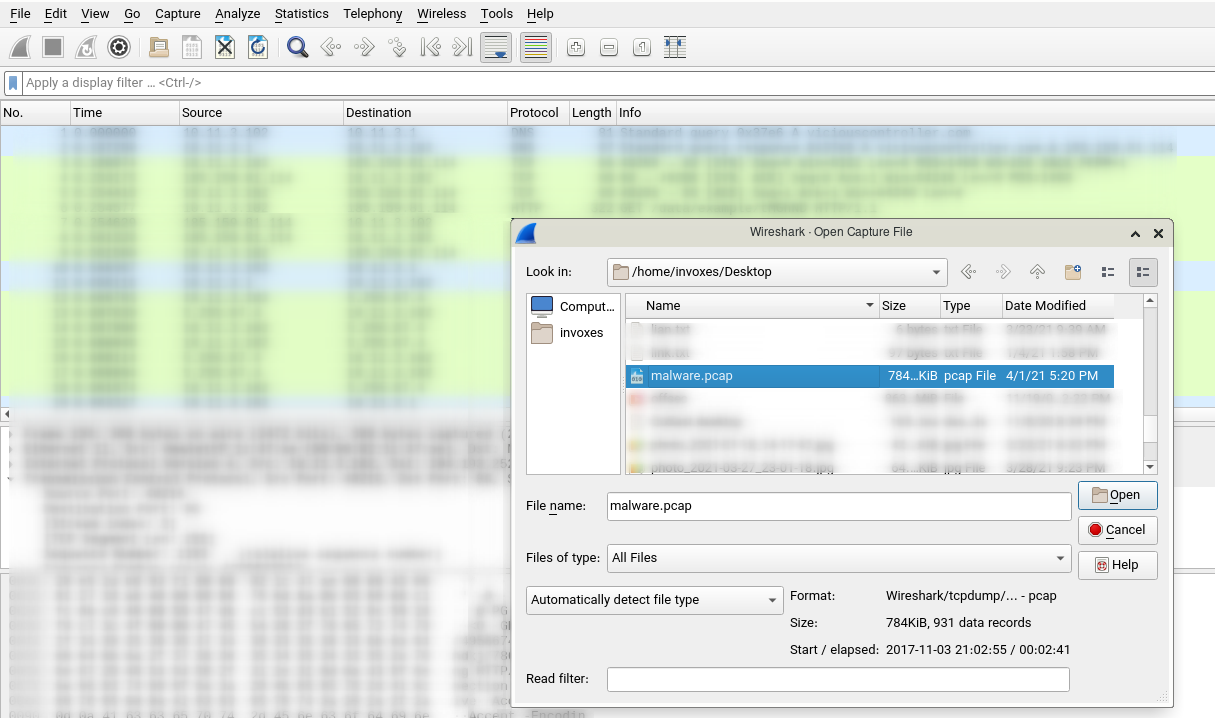
When you Open a PCAP file, depends on the system resources and PCAP size, it can take seconds or minutes to open.
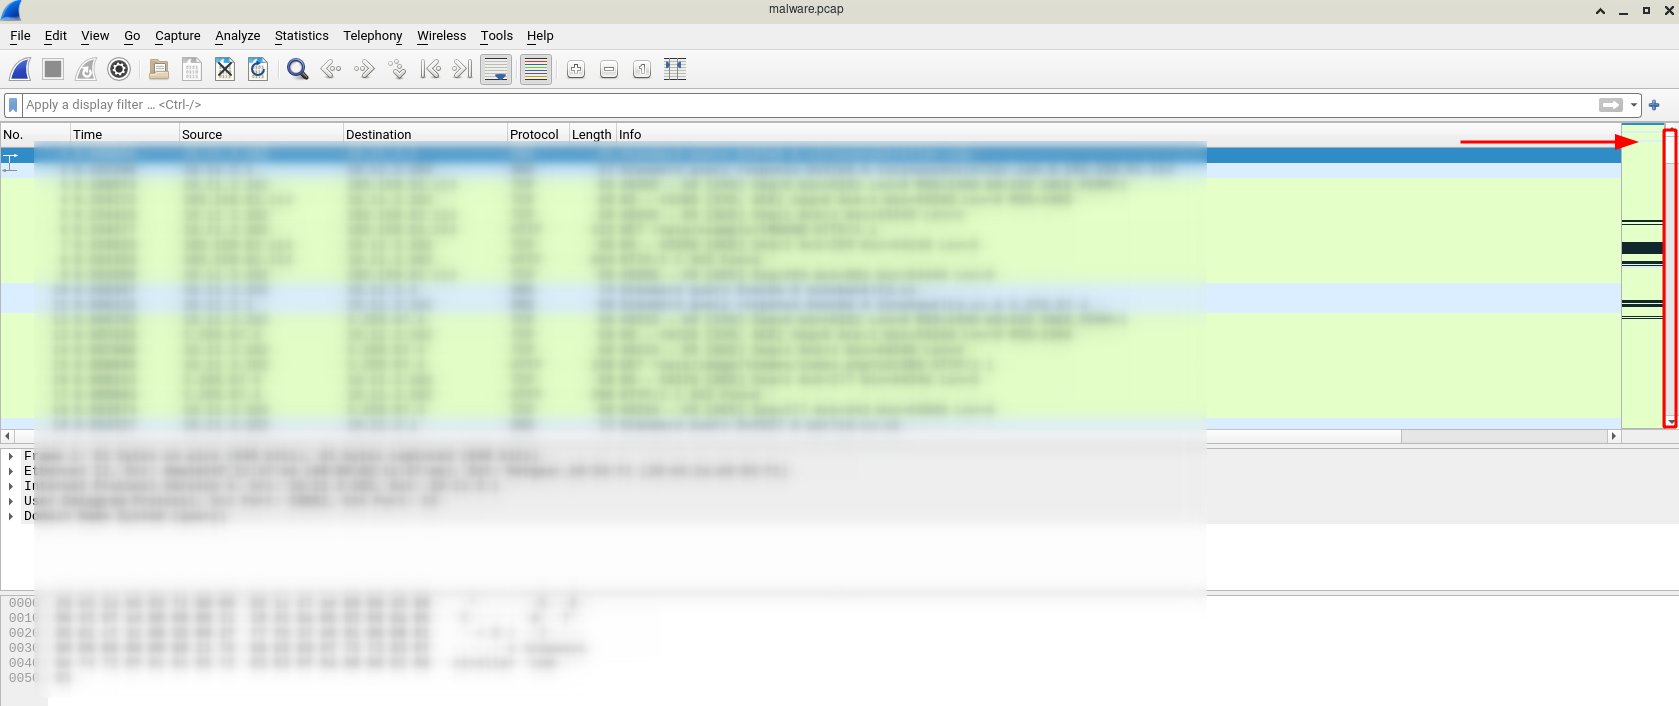
It seems there are lots of packets in the PCAP file.
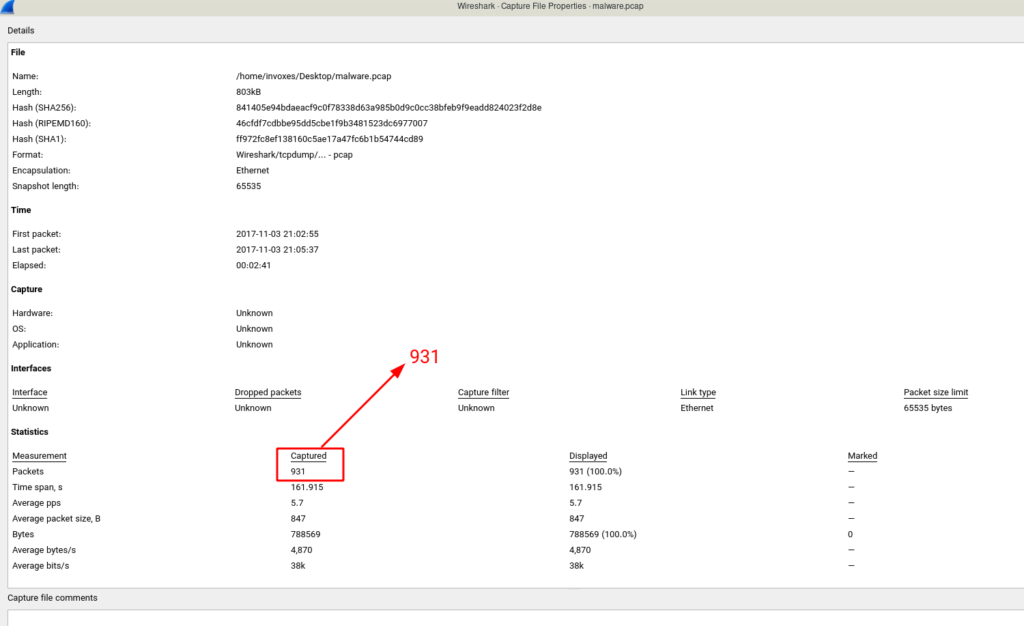
Select Statistics -> Capture File Properties from the menu bar (Shortcut: Ctrl+Alt+Shift+C) to see some information about PCAP file.

In the opened window, we can see how many packets captured and as already we guessed there is 931 packet.
Now we must make a list of endpoints in the captured packets. to do this just select Statistics -> Endpoints from the menu bar.
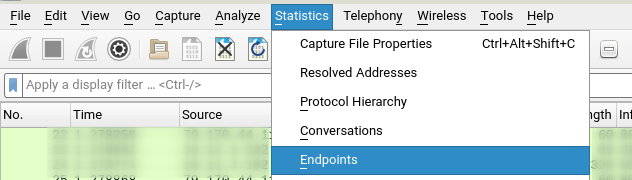
Now we can see endpoints, easy right?!

What we have learned so far is that, there are so many endpoints and also we have 931 packets. Now we should determine what kind of connections do we have.
To do this select Statistics -> Protocol Hierarchy from menu bar.
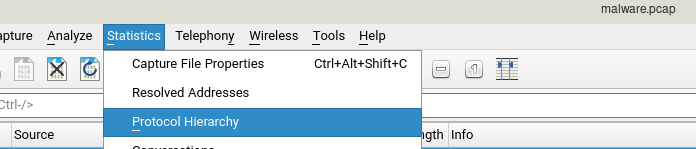
It seems most of the requests were DNS requests or HTTP requests.
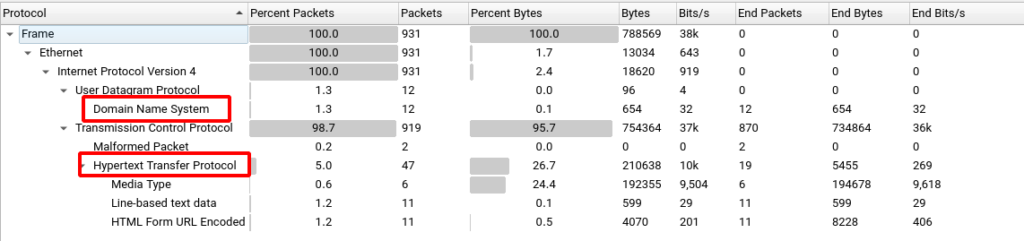
We will now start reviewing some of the packets sent. As you can see in the top image, there are some media types connections. If we look at captured packets in-depth, we can find a word (.doc) document and an image with PNG extension.
Note
Malwares use different type of techniques to avoid detection by monitoring systems. One of these techniques is downloading a malicious file by a trojan with png, pdf, etc. file format.
The below image shows sent packets to download 78654543.png file. The first HEAD request is to ensure the file exists and then download of the image is started.
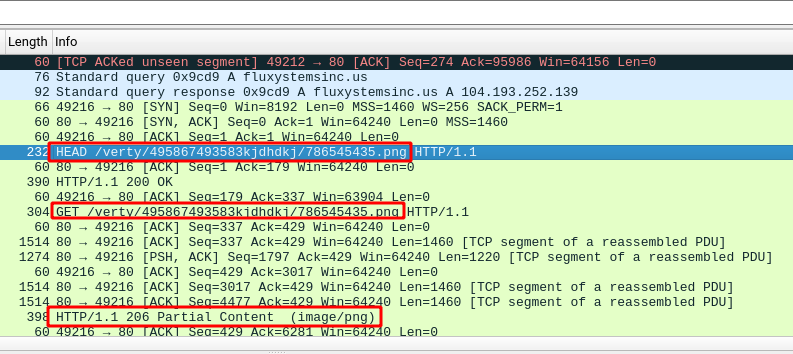
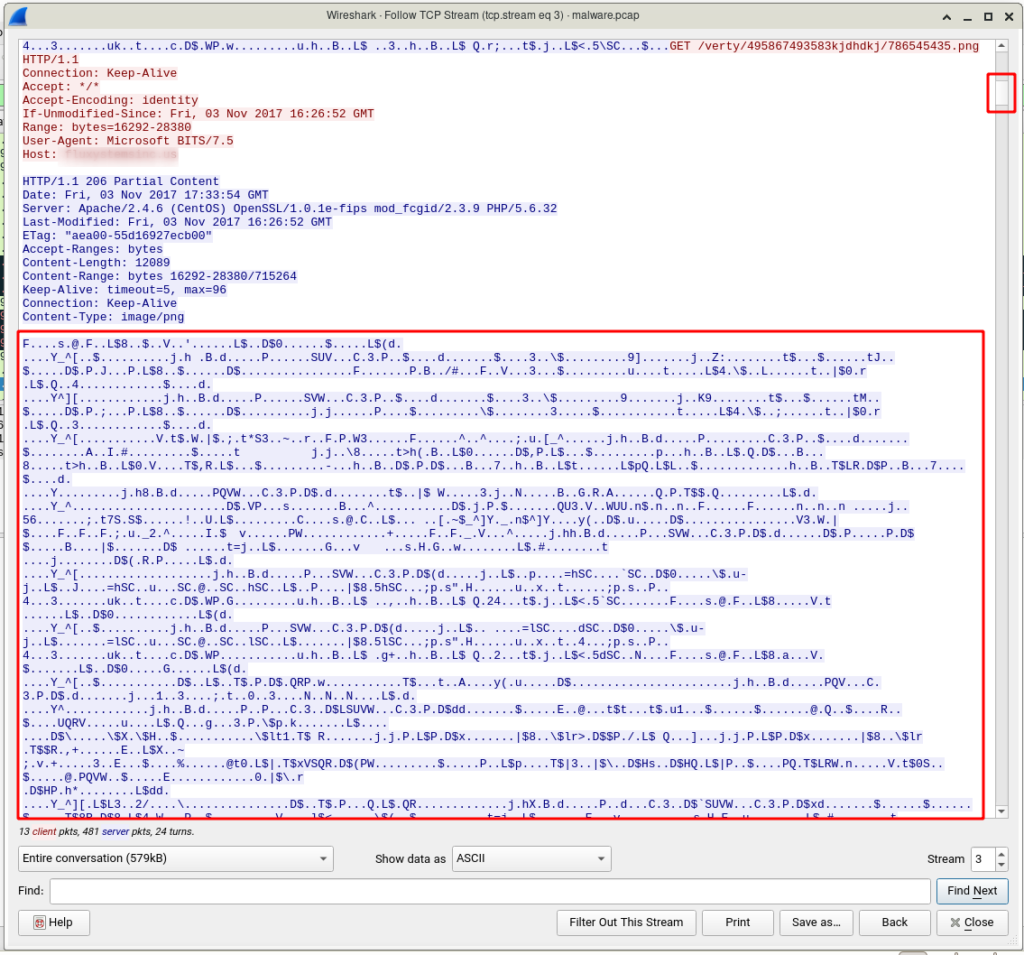
But WAIT! The response type from the server is 206 Partial Content! This status means that the file has a large size and the server divided it into small pieces (Segmentation) and send them. Right-click on one of the PNG requests and then select Follow -> HTTP Stream (Shortcut: Ctrl+Alt+Shift+H) also you can choose TCP Stream, it doesn’t make any difference here.

Another window will open which contains requests packets to download the PNG file.
If you look at it carefully, you will see a suspicious thing, PNG is a Windows executable file. You can detect it with a file header “MZ”.
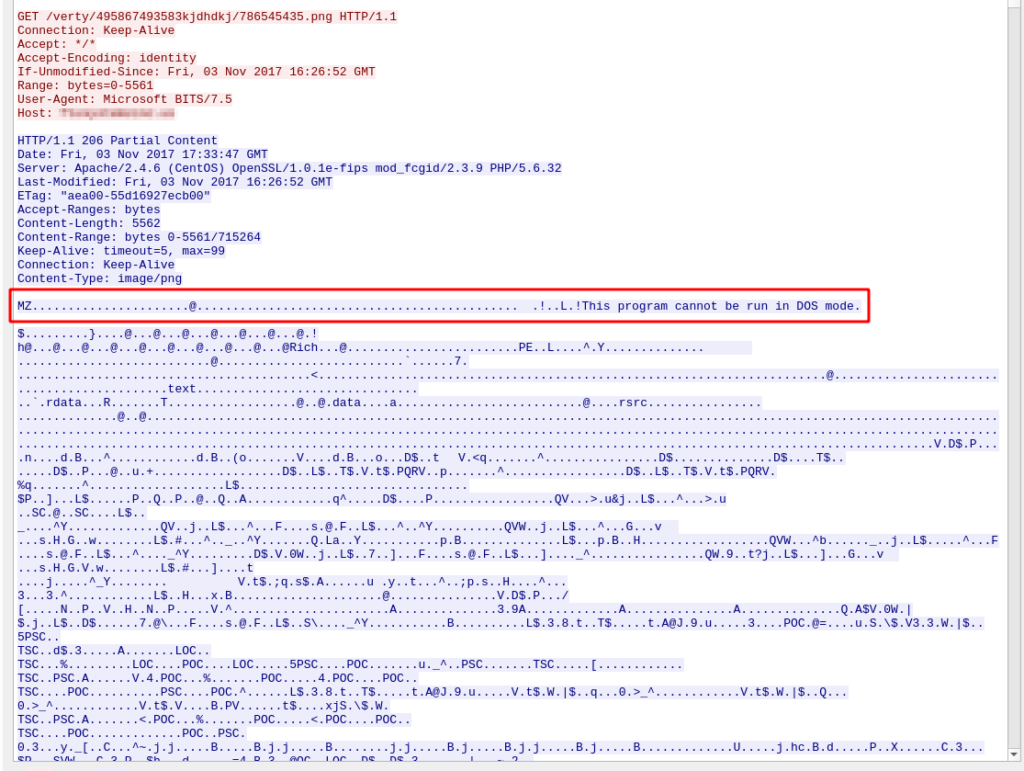
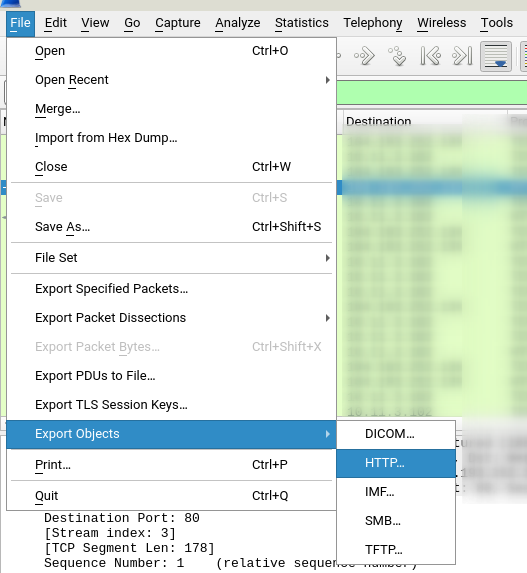
So this is a malicious request. We need to extract this file from captured requests to give it to malware analysts for in-depth analysis and reverse engineering to understand what does this malware. There are several ways to do it, One of the simple ways is to use Export Objects, Select File -> Export Objects -> HTTP from the menu bar.
The following window will open and the sent and received files by HTTP Protocol will be visible.
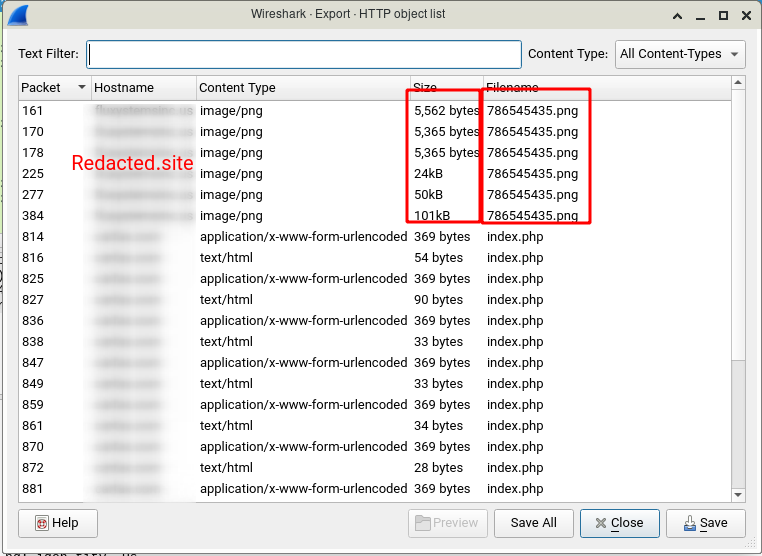
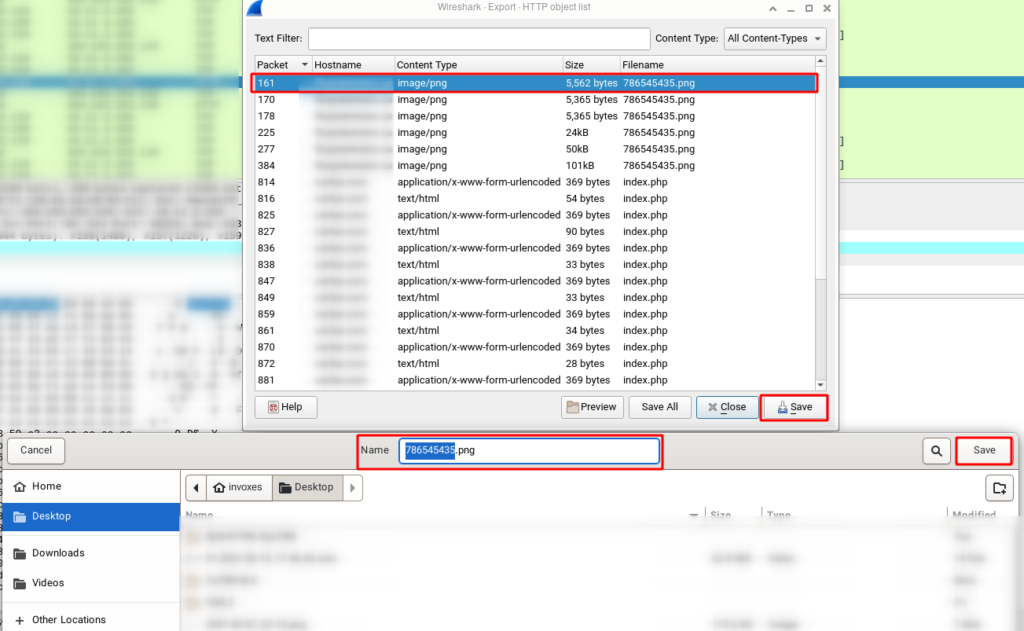
As you can see cause of the Partial Content response type, files are divided into multiple parts. The Files can be downloaded and merged, to download and save the files click on each part and select the Save button.
It seems part 4 had some trouble and it’s corrupted. I’m sure because in TCP Stream the fourth request is 12089 bytes but the fourth request in the top image is 24 KB.
If we check the Partial Content requests, We will see there is a problem in the fourth request and cause of TCP nature file downloaded twice.

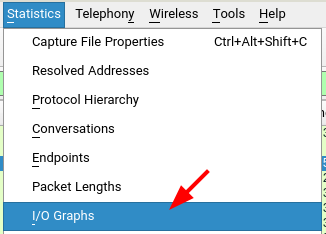
To ensure that select Statistics -> I/O Graphs and you will see TCP errors.
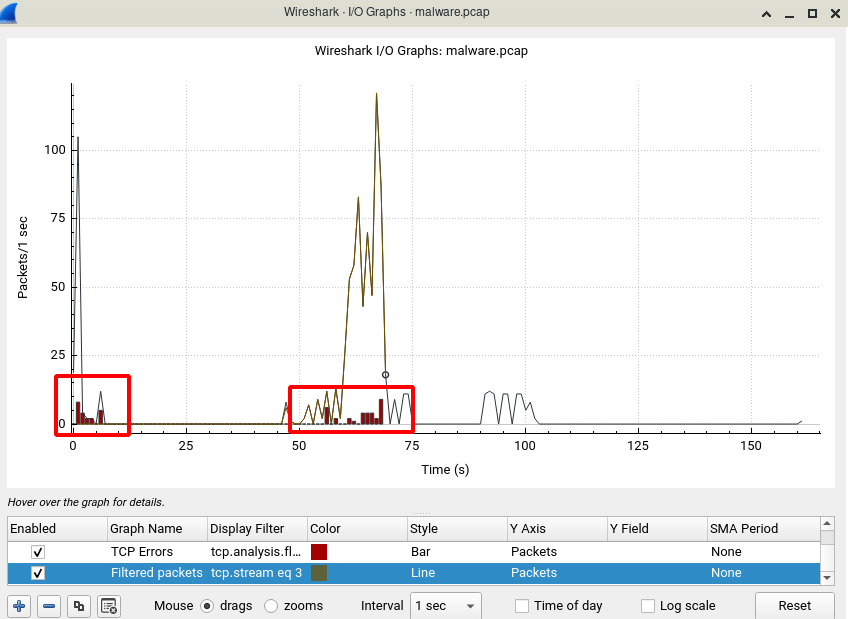
it seems Wireshark can’t detect these issues and fix errors, Then we need a way to fix this problem. Let’s Use Google/DuckDuckGo.
One of the result in google is a SANS paper which introduce ChaosReader.
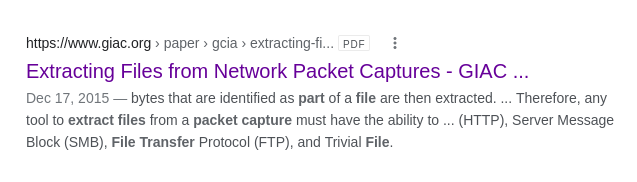
One of the result in google is a SANS paper which introduces ChaosReader.
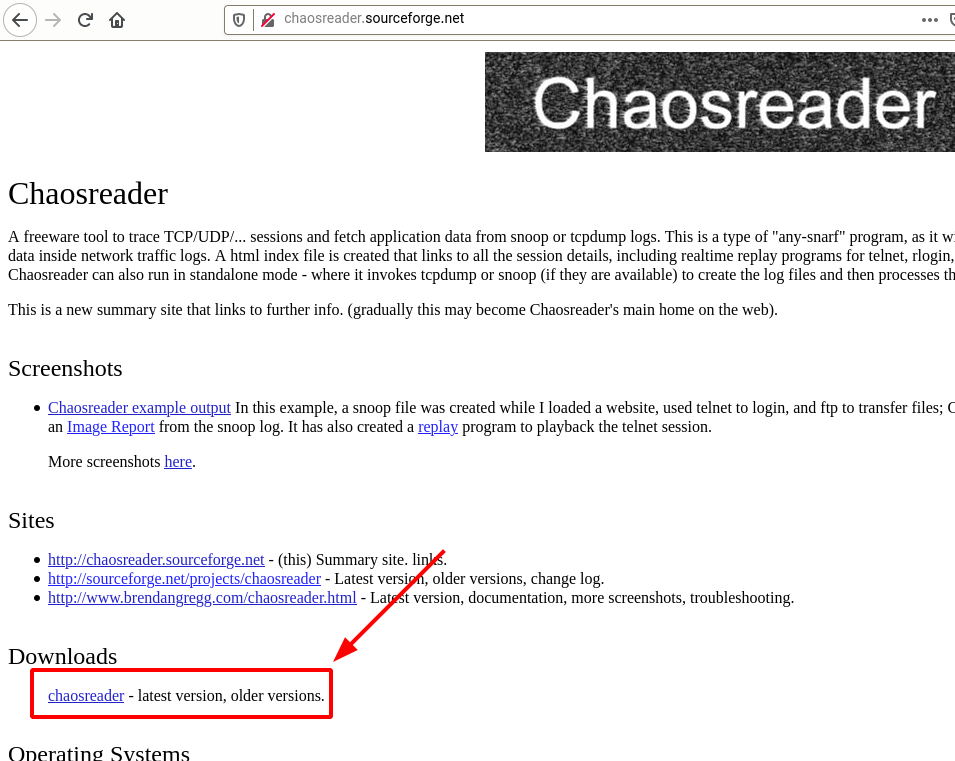
To try this tool, search it on google and download it.
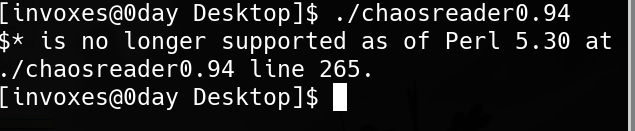
This tool is written in Perl language. You will encounter an error while running the tool.
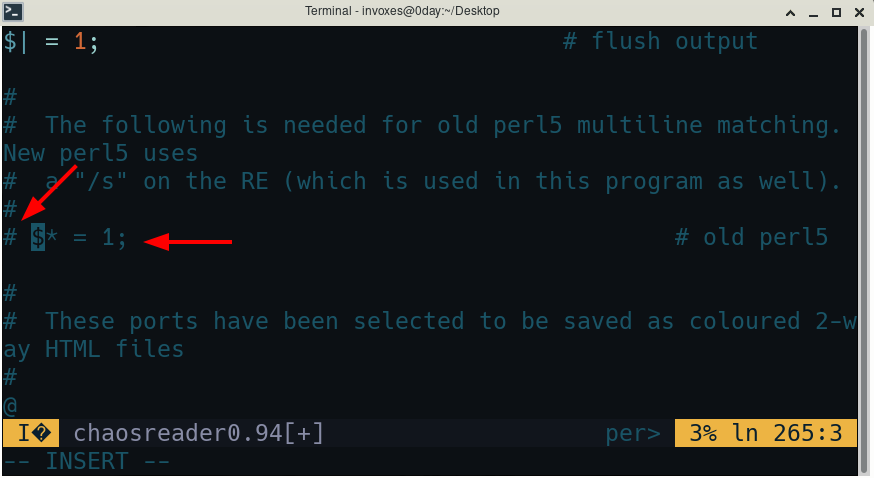
The root of the problem is the version used. Open ChaosReader file in an editor (like NeoVIM) and go to line 265 and make it a comment.
Save the file and run it again. this time run it with --help switch to see the help page?! :)
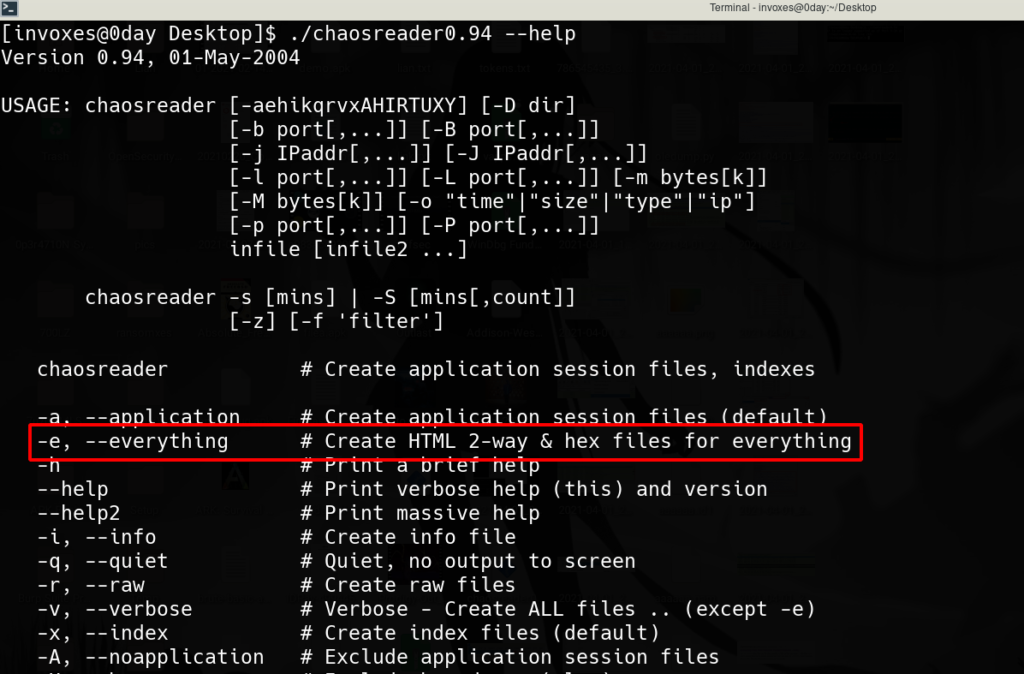
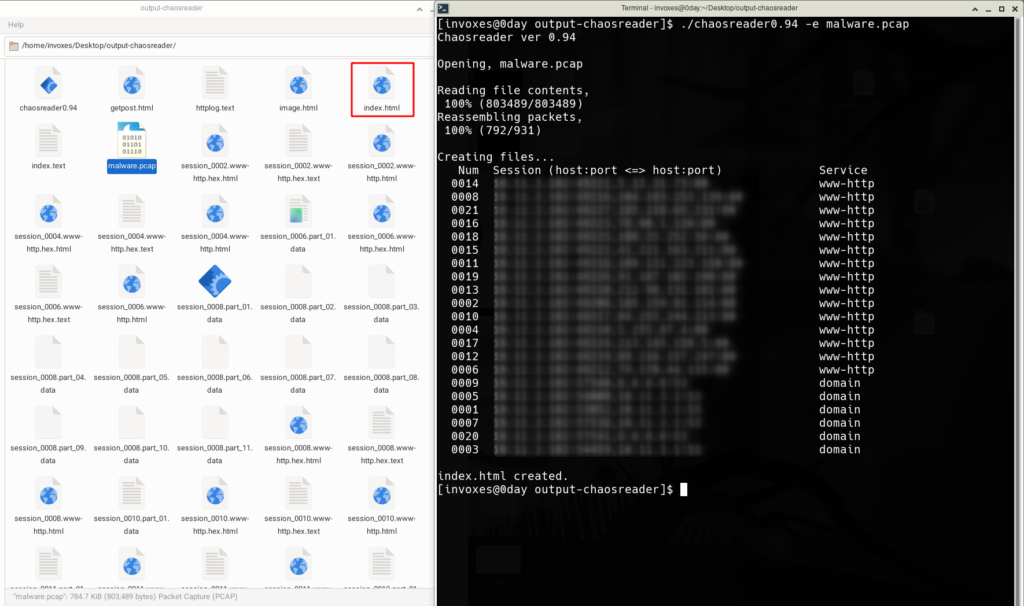
It seems the tool needs a switch to run the whole process on a PCAP file. First, create a directory and move the PCAP file and ChaosReader file to it (because the output of the ChaosReader process is in the current directory and it is mess output :)). Run the tool with -e switch and give it the PCAP file name. The tool creates some HTML, HEX, and other types of files.
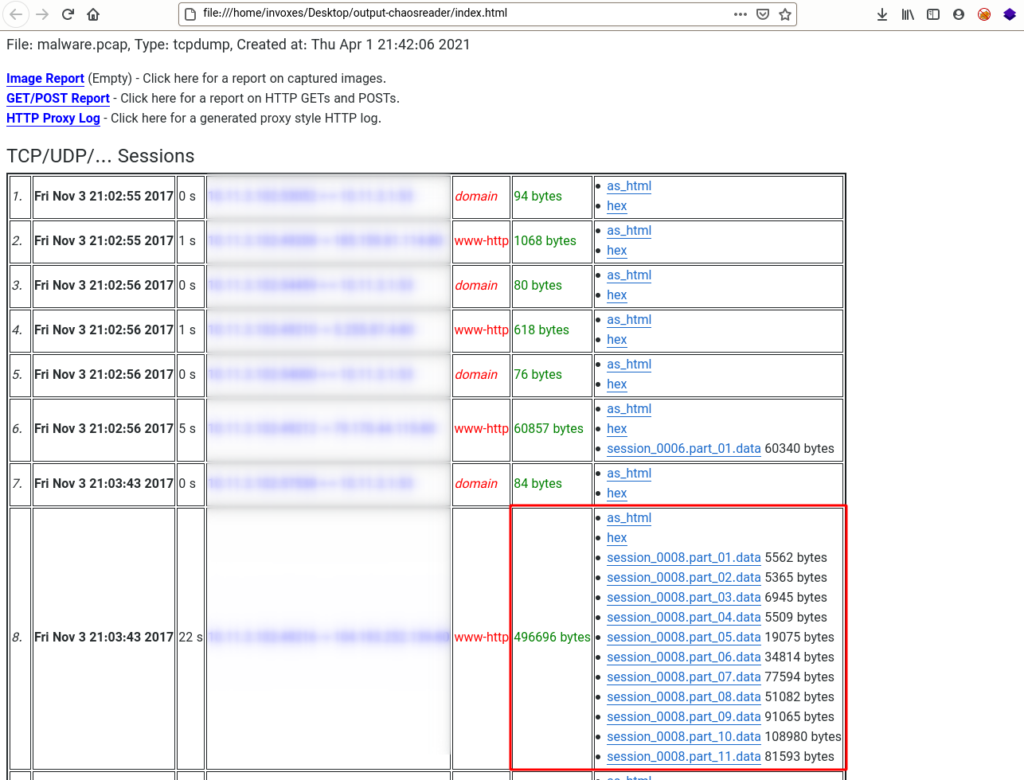
There is a file with index.html name in the directory of output, open it in browser (like Firefox, Chromium). According to the size and counts of the HTTP responses in a TCP session, we can guess the red box marked in the below image is for download Malicious PNG file. (You can use as_html or hex to see the content)
Now we can download files with the .data extension or copy them from the output directory and then merged them as a file with the cat command in GNU/Linux or BSD.
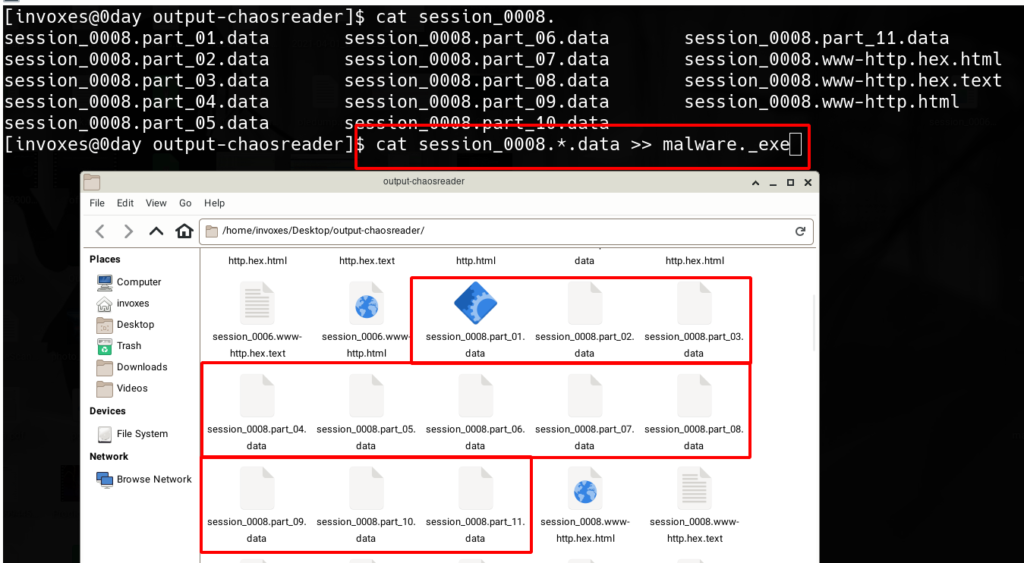
Now the malware is ready with the malware._exe name. All we need now is to open it in a reverse engineering tool like Radare2,IDA Pro, or Ghidra, etc.
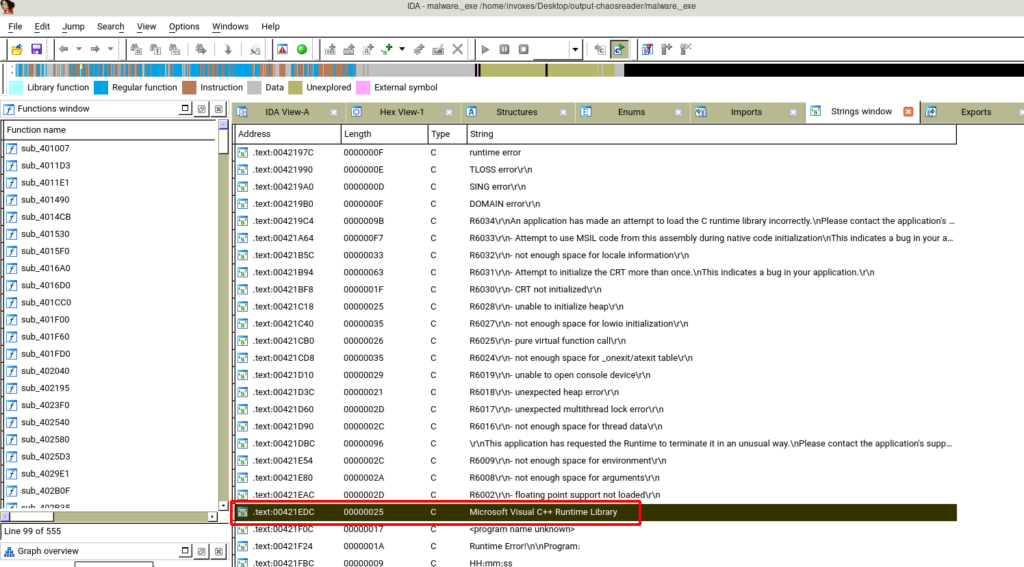
The file seems OK and it’s a PE file. If you check the strings of the file, we see it is developed by C++ programming language. Now a malware analyst can reverse and analyze this. The rest of the process involves reverse engineering knowledge and malware analysis, and now a malware analyst can examine it.